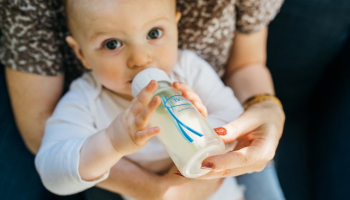

Explore the most effective methods for drying baby bottles—a crucial read for every new parent dedicated to ensuring hygiene and safety for their infant.
Babies, with their delicate digestive systems and developing immune responses, are particularly vulnerable to illnesses. This underscores the importance of maintaining strict cleanliness with all baby feeding equipment. While there are multiple ways to dry baby bottles, ranging from air drying to using cloth towels, the most efficient and hygienic method we recommend is using a bottle dryer.
Why do baby bottles need to be dry?
Baby bottles need to be completely dry to prevent bacteria. It doesn’t matter if you use sterilizing solution, steam sterilizing, or plain old soapy water and a bottle brush; you’ll get your baby’s bottles wet. Where there’s water, there’s the potential for germs, which could attack your baby’s immune system as you’re bottle-feeding.
This means that drying your feeding equipment is essential to the cleaning process. Although this article concerns drying baby bottles, the same comments apply to other feeding equipment, such as breast pumps.
Sterilizing Baby Bottles
- Vital for Infant Health: Regular sterilization is essential for infants under 12 months, as their immune systems are still developing, making them vulnerable to germs and bacteria.
- Various Sterilization Methods: You can choose from several sterilization methods, such as steam sterilizers, boiling water, or microwave systems. After the first year, thorough cleaning with hot soapy water becomes sufficient.
- Convenience of a Sterilizer with Drying Function: A sterilizer that also dries bottles can significantly streamline the cleaning process, acting as an all-in-one solution for busy parents.
3 Effective Methods for Drying Baby Bottles

There are three primary ways to ensure your baby bottles are dry and safe for use:
1. Using a Clean Towel or Kitchen Roll
- Not Recommended for Very Young Babies: This method, while quick, risks transferring bacteria from the towel or kitchen roll to the bottle, which can be harmful for infants.
- Use Only in Urgent Situations: If in a rush and your baby is older, a fresh kitchen roll or a clean towel can be an emergency solution. Still, it’s advisable to avoid this method as much as possible due to hygiene concerns.
2. Air Drying (Preferably on a Drying Rack)
- Efficient Use of Space: A proper drying rack optimizes counter space and is specifically designed for baby bottles, unlike regular dish racks which can be bulky and less effective.
- Ensures Proper Drying: These racks facilitate correct positioning of bottles, ensuring they dry completely and quickly, without trapping moisture.
- Ease of Maintenance: Unlike larger draining racks, baby bottle drying racks are easier to clean and drain, often fitting into a dishwasher, making maintenance hassle-free.
3. Using a Baby Bottle Dryer
- Highly Recommended for Efficiency: A bottle dryer is an excellent investment for quick and hygienic drying, reducing the chances of bacterial growth.
- Dual Functionality: These dryers not only dry bottles efficiently but can also serve as a convenient storage solution, saving space and keeping bottles ready for use.
- Ideal for Busy Parents: Especially useful for parents who are short on time, a bottle dryer simplifies the cleaning process without compromising on hygiene.
Best Bottle Dryers on the Market

This is a multi-purpose device that serves as both a bottle dryer and a pacifier sterilizer. It uses steam to effectively dry and sterilize baby bottles and pacifiers.
Pros:
- Dual functionality for drying and sterilizing.
- Uses steam to ensure thorough sterilization.
- Compatible with most bottle sizes and brands.
- Compact design saves counter space.
Cons:
- Some users might find the drying process slower than other methods.
- Limited capacity compared to larger sterilizers.

The Papablic electric steam sterilizer is designed to quickly and effectively sterilize baby bottles, pacifiers, and other small baby items using steam.
Pros:
- Fast and efficient sterilization process.
- Can accommodate multiple bottles and accessories.
- Easy-to-use control panel.
- Compact design fits well in most kitchens.
Cons:
- Some users might experience issues with the durability of the device over time.
- Water might accumulate at the bottom after sterilization.

The Baby Brezza bottle sterilizer machine offers steam-based sterilization for baby bottles, pacifiers, and other small items, providing a hygienic environment for baby feeding accessories.
Pros:
- Spacious design can hold multiple bottles and accessories.
- Quick sterilization cycle.
- Easy-to-use control panel.
- BPA-free construction for safety.
Cons:
- Relatively larger footprint compared to other sterilizers.
- Some users might experience difficulties with the drying function.

The Philips Avent sterilizer uses steam to sterilize baby bottles and accessories. It offers different sizes and designs, including microwave and electric models.
Pros:
- Trusted brand with a variety of options.
- Models available for both microwave and electric sterilization.
- Efficient and reliable sterilization process.
- Modular design allows customization of space usage.
Cons:
- Some users might find the electric models take up counter space.
- Microwave models require access to a microwave.

The Hauture electric pacifier sanitizer is designed to quickly sanitize pacifiers and other small baby items using UV light.
Pros:
- UV light technology effectively kills germs and bacteria.
- Portable and compact design.
- Quick sanitization process.
- Can also be used for other small items.
Cons:
- Limited to pacifiers and small items.
- Might not accommodate larger baby bottles.
What to do once your bottles are dry?
Storing in a Sterilizer
The best practice is to leave the bottles in the sterilizer until you need them. This is the safest way to prevent any bacterial growth. However, this may not always be practical, especially if you are processing bottles in batches.
Reassembling the Bottle Parts
After drying, it’s crucial to reassemble the bottle parts as soon as possible. This is to avoid the risk of moisture from the air condensing inside the bottles, which can create an environment for bacteria and germs.
Handling During Assembly
If using sterile tongs is challenging, ensure you wash your hands thoroughly, use hot water, and dry them well before assembling your bottles. It’s important to make sure no water from your hands gets onto the bottles, both on the outside and inside.
Alternative Storage Solutions
If you can’t store the bottles in the sterilizer, find a clean and dry place where they’re unlikely to come into contact with water. Ideally, use the reassembled bottles within 24 hours to maintain hygiene, or re-sterilize and dry them again if they have not been used.
Conclusion
Ensuring thorough and proper drying of baby bottles is a fundamental aspect of maintaining your baby’s health and safety. By allowing bottles to completely dry after washing and sterilization, you create an environment that discourages the growth of harmful bacteria. This simple yet essential step contributes to the overall hygiene and well-being of your little one. As you embark on your parenting journey, remember that the diligence you put into the drying process plays a significant role in providing a safe and clean feeding experience for your baby.
Frequently Asked Questions
How often should I sterilize baby bottles?
It’s recommended to sterilize baby bottles, nipples, and other feeding accessories until your baby is at least 12 months old. During this crucial period of immune system development, sterilize after every use to ensure optimum cleanliness and safety.
How long do bottles stay sterile?
If you’ve properly sterilized baby bottles and kept them covered, they can remain sterile for about 24 hours. However, it’s advisable to sterilize bottles immediately before use to minimize the risk of contamination.
Are you supposed to microwave baby bottles?
Microwaving baby bottles can be risky. Uneven heating can create hot spots that scald your baby’s mouth. Also, some plastic bottles might leach harmful chemicals when microwaved. If you need to warm a bottle, use a bottle warmer or warm water, and always test the temperature before feeding your baby.
Do baby bottles have to be completely dry?
Yes, it’s important for baby bottles to be completely dry before use. Any remaining moisture in the bottles can become a breeding ground for bacteria and germs, which could pose a health risk to your baby. Thorough drying helps ensure the bottles are safe and hygienic for your infant’s use.
How do you dry the inside of a bottle quickly?
To dry the inside of a bottle quickly, you can use a clean and absorbent bottle drying rack, where the bottle can be placed upside down to allow water to drain out and air to circulate. Alternatively, a specialized bottle dryer can be used for a quicker, more efficient drying process. These dryers are designed to circulate warm air inside the bottles, speeding up the drying time.
Is condensation in baby bottles OK?
Condensation in baby bottles is not ideal, especially if the bottles are meant to be stored for later use. This condensation can encourage the growth of bacteria and mold inside the bottle. If you notice condensation, it’s best to either let the bottle air dry completely or use it immediately after ensuring it’s still clean and safe for your baby.
Last update on 2024-07-27 / Affiliate links / Images from Amazon Product Advertising API